
5 Minute Guide: How To Create A Child Theme In WordPress
As my final post of 2015, I’d like to show all of you how to create a child theme in WordPress in just 5 minutes (you have Swiss Toni’s cast iron guarantee on that!).
How To Create A Child Theme In WordPress In Just 5 minutes
Step 1: Download A Parent Theme You Like
This can be pretty much any free or premium theme, even the default 20xx themes that WordPress provides you each year. To start off, you should try to select a theme that has a design you already like but you want to make some small tweaks to that aren’t available in the theme options (e.g., changing the colours of a footer bar).
Step 2: Create A Child Theme
I know what you’re thinking, because after that last easy step we’re pretty much going from 0-100, but don’t worry, this step is much easier than you think.
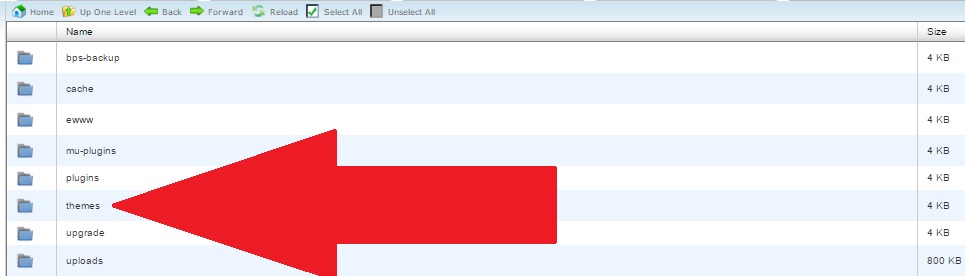
Step 2.1: Create Your Child Theme’s Folder
Open up your web host’s file manager and open up the WP-Content folder and then the Themes folder. Create a new folder and name it whatever you want to name your child theme.
Step 2.2: Create A Style.CSS file
Now, all you have to do to create a Style.css file is to create a new file in your file manager and name it “style.css” without the quotes.
Step 2.3: Add Code To Your Style.CSS File
There are 2 pieces of code you want to add: the information code and the import code.
Step 2.3.1: The Information Code
Simply copy and paste this code into your Style.css file and change out the red text to your own information.
/*
Theme Name: Sycosure Tutorial
Theme URI: https://www.sycosure.com/
Description: Sycosure’s Child Theme Tutorial
Author: Alistair Kavalt
Author URI: https://www.sycosure.com/
Template: Sycosure Theme
Version: 1.0.0
*/
Step 2.3.2: The Import Code
There are actually 2 codes you can add (use one or the other, never both), the import code and the wp_enqueue_style function. The import function is slower, but the wp-enqueue function requires you to create a functions.php file in your child theme’s folder (simply redo step 2.2, except name the file functions.php) and then add the following code to it:
<?php
function theme_enqueue_styles() {$parent_style = ‘parent-style’;
wp_enqueue_style( $parent_style, get_template_directory_uri() . ‘/style.css’ );
wp_enqueue_style( ‘child-style’,
get_stylesheet_directory_uri() . ‘/style.css’,
array( $parent_style )
);
}
add_action( ‘wp_enqueue_scripts’, ‘theme_enqueue_styles’ );
?>
If you decide to use that function, then you do not needto add the code below to your style.css file.
@import url(“../Sycosure/style.css”);
Now go to your theme’s folder and activate your child theme. If you did everything correctly, your child theme should load up exactly the way the parent theme does.
Step 3: Adding Content To Your Child Theme
Now, for the part that nearly every other guide doesn’t cover, how to add content to your child theme. Because this isn’t a coding website, I won’t go into great detail about CSS, PHP, HTML, or any other markup languages. I will, however, provide you with a few tips on how I modify my own themes.
- Tip #1: Use the “Inspect Element” tool in your browser to find pieces of code that you want to modify
- Tip #2: If you need to insert specific codes into your style.css file, the CSS codes in my Blogger Conversion Kit might be useful (I’m even using one on the front page of this site)
- Tip #3: Look for the style code in your style.css file after you find it using the Inspect Element tool to ensue that you get the exact code.
- Tip #4: For colour changes, view the “Styles” section of the Inspect Element tool to find specific colours.

- Slow Website? Consider Robots As Being The Culprit - June 24, 2025
- My Experience Accepting Crypto Payments For The First Time - April 25, 2025
- Are Forums Dying? A Look Into Forums As A Whole - April 22, 2025